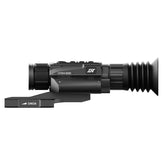
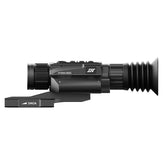
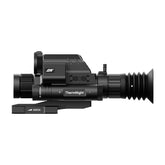
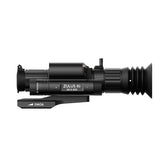
QDM150 Quick Detach Mount Instructions
The QDM150 is a versatile, multi-functional mount designed to enhance your shooting and hunting experience. When paired with the HYDRA series, it unlocks HYDRA's full potential, allowing seamless switching among clip-on, standalone, and handheld modes. It's also fully compatible with the ZULUS and ThermNight series, offering broad flexibility.
Featuring Picatinny slots on both sides, the QDM150 provides quick-detach functionality on one side, ensuring fast, secure mounting and removal. In this guide, we’ll walk you through how to use the QDM150 mount effectively.

STEP 1. Installing the Picatinny Rail Adapter to Your Scope
The QDM150 comes with a separate Picatinny rail adapter. To begin, install the adapter onto your scope using the two provided screws. The recommended torque is 35 in-lbs.STEP 2. Choosing Your Mounting Direction
You can choose to fix the mount either to your rifle or to your scope.
Fixing the QDM150 to the Rifle (Recommended)
When the mount is fixed to the rifle, you can easily detach the scope and its attached adapter. This allows the HYDRA to quickly switch among clip-on, standalone, and handheld modes.

Fixing the QDM150 to the Scope
When the mount is fixed to the scope, the QDM150 functions like a standard quick detach mount, allowing you to quickly attach and detach the entire scope and mount assembly from the rifle.
The instructions below are based on fixing the QDM150 to the rifle. For the alternative mounting direction, refer to STEP 3 for fixing the QDM150 to the scope, and STEP 4 for attaching the scope (with the QDM150) to your rifle.

STEP 3. Fixing the QDM150 to Your Rifle
1. Loosen the two screws on the side plate of the mount.
2. Tilt the QDM150 slightly and align the mount with a slot on the Picatinny rail. Once aligned, roll the mount back to fit it securely onto the rail.
3. Fasten the two screws on the side plate to secure the mount. The recommended torque is 30 in-lbs.
STEP 4. Mounting Your Scope on the QDM150
Once the QDM150 is fixed to your rifle and the adapter is on your scope, you can mount the scope:
1. Press the locking latch down to release the lever.
2. Tilt the scope slightly and align a slot on the Picatinny adapter with the positioning block on the QDM150. Once aligned, roll the scope back to fit it securely onto the rail.
3. For accurate and consistent re-mounting, you can choose to use the supplied Picatinny rail fillers to block the unwanted slots on the adapter, leaving only your chosen slots available for alignment.
4. Push the lever back until the locking latch clicks, securing the scope in place.
STEP 5. Adjusting the Mount Spacing
If you encounter any of the following issues, you may need to adjust the mount's spacing:
-
The slot is too tight to fit your scope.
-
The lever is too tight to lock back into place.
-
The mount is not steady, or there is a gap between the mount and the scope.
To adjust the spacing, follow these steps:
1. Push and hold the lever toward the side plate to unlock the adjustment screw.
2. Tighten or loosen the adjustment screw using your fingers or a flat-head screwdriver.
3. Once adjusted, release the lever. The adjustment screw will automatically lock back into position.
STEP 6. Releasing the Mount
To quickly detach your scope from the rifle, press the locking latch to release the lever, then pull the lever to loosen the mount.
That's the QDM150 tutorial. Try it out for yourself and unlock its full potential!


Leave a comment
Please note, comments need to be approved before they are published.