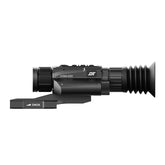
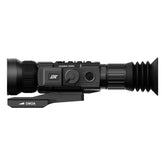
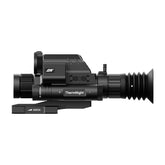
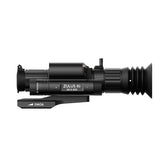
DNT Optics One-Shot Zero
Author: Nicholas C
Whether you are a customer first setting up your DNT Optics digital scope or someone who is curious how our One-Shot Zero works, we will go into detail how you can perform a One-Shot Zero so you can save time and ammo allowing you to focus on other matters like preparing for your hunt.
What Is One-Shot Zero?
The DNT Optics One-Shot Zero is a tool in our digital scopes to help you zero the reticle for your weapon of choice. It does not matter if you are using an airgun, firearm or a crossbow. The One-Shot Zero is performed the same. First let us manage your expectations. The One-Shot Zero is fast but may require more than a single shot depending on your weapon and projectile of choice. Under ideal scenarios you can zero your reticle with a single shot fired. But let us be realistic, it might take a couple more. However here are some tips to help set you up for success.
Preparation Tips Before Zeroing
Make sure your DNT Optics scope is installed correctly and the screws are properly torqued. When you are ready to zero your DNT Optics digital scope of choice, go to a range where you can shoot safely. Turn on your DNT Optics scope and make sure you are at base magnification. This will make it easier to see your projectile impact and later we will zoom in to dial in the reticle position.
Zeroing with ZULUS V1
We will start with the ZULUS V1. Once you are setup, press the menu button and hold it down to enter the settings menu. Press the RIGHT button to move over to “Zero Reticle”. Press the up (video record) button to go into that setting. Once you are in the ZULUS V1 Zero Reticle menu, you will see a white bar at the bottom of the screen.

ZULUS V1 Zero Reticle Menu
From left to right: Current magnification level (you cannot adjust this here), Zero Profile, X position, Y position, Reticle Style, Reticle Color.
A letter will be highlighted in teal, this is the zero profile you are currently adjusting. You can change the zero profile from A to Z. You can store up to 26 different zero profiles. Pushing the LEFT or RIGHT buttons will cycle through the different options you can adjust.
While aiming your scope, shoot at something that will allow you to see your projectile’s impact. Some people like to shoot at a dirt backstop to make it easier to see the projectile’s impact. This is helpful if your shot is off paper. If you can see where the projectile impacted then aim the scope back to your original point of aim. While carefully holding the gun, as steady as possible, lightly press the POWER button on the ZULUS V1. This will freeze the image in the scope. Once the image is frozen, you can relax and you do not have to hold your gun steady anymore. While looking into the ZULUS V1, move over to the X=0 setting. Push the up or down arrow to adjust the X value. Pressing UP will increase the value moving the reticle to the right while pressing DOWN will decrease it and move the reticle to the left. Move the reticle over to where your projectile impact was. Now press the RIGHT button to move over to the next adjustment and you can adjust the Y value. Pressing the UP button will move the reticle up increasing the Y value and pressing the DOWN button will lower the reticle as well as the Y value. Pressing and holding the UP or DOWN buttons will move the reticle faster.
Once your reticle is where your projectile had landed, you can lightly press the POWER button once more to unfreeze the image. Take another shot to confirm your zero. If you want to dial in the reticle position, long press the LEFT key to save and exit. If you long press the RIGHT key, you will exit without saving.
Exit out of the settings menu entirely and zoom in with the scroll wheel. Now go back into the settings menu and then the Zero Reticle menu. Here you can take another shot at full magnification to see how well you zeroed your reticle. If you need to readjust the reticle position, then repeat the steps above. You don’t have to shoot at dirt anymore. Depending on your zero distance, you may be able to see impact on paper.
Zeroing with TNC225R
The ThermNight TNC225R settings menu is a bit different from the ZULUS V1. It is a vertical list that you cycle through with the UP and DOWN buttons. Press RIGHT to enter that setting. The “Zeroing” menu is similar to the ZULUS V1 but with the option to switch between digital and thermal channels.

TNC225R Zeroing Menu
Just like the ZULUS V1, pressing RIGHT or LEFT will cycle through the different Zeroing menu options in the TNC225R. Pressing UP or DOWN will change the highlighted option. Unlike the ZULUS V1, the TNC225R only has five zero profiles, A to E. We recommend zeroing the digital reticle first. Just like the ZULUS V1, start at base magnification and move the reticle to your point of impact. Hold the RIGHT button to save and exit. Holding the LEFT button will exit without saving. Once you save and exit, a window will pop up asking if you want to switch to another mode.

TNC225R Pop-up Window
CANCEL will be highlighted. Press UP to switch to OK. Once OK is highlighted, press DOWN to go back to CANCEL. Press RIGHT to choose either option. Pressing LEFT will exit this screen. Pressing LEFT again will exit the settings menu completely.
If you want to continue to zero the thermal reticle, switch back to DIGITAL if you are still in the Zeroing menu. If you exited the Zeroing menu, go back in. Now point the reticle at something obvious that you can see in THERMAL. The corner of your target stand is a good example. While holding your scope steady, quickly press the POWER button to freeze the image. Now highlight DIGITAL and press UP or DOWN to switch to THERMAL. The image will still be frozen and now you just need to move the X and Y of the thermal reticle to the same corner your digital reticle was aimed at. Once zeroed, unfreeze by pressing the POWER button quickly and take another shot to confirm your zero.
Zeroing with Hydra, TNC335R, TNC635R, or ZULUS V2
Zeroing our newer digital scopes like the Hydra, TNC335R, TNC635R or ZULUS V2 is even easier with their new settings menu.

ZULUS V2 Menu
The new settings menu is an evolution of the TNC225R menu system and was designed to be more intuitive. Press up or down to cycle through the options. Press RIGHT to go into the desired setting of your choice. Once you are in a setting, press UP and DOWN to cycle through the options and press RIGHT to choose an option. Press LEFT to go back and exit the option you are in. Keep pressing LEFT to exit the settings menu.

ZULUS V2 Zeroing Menu
In the Zeroing option you will see a box with 6 options. (Post photo of this menu). You start off highlighting the Zero Profile box in yellow. Pressing RIGHT will change this option, you have ten zero profiles to choose from. Press DOWN to highlight the Freeze option. You can lightly press the POWER button to freeze the image as well. Move down to the X and Y numbers to alter them. Pressing RIGHT increases their respective values, while pressing LEFT will decrease them. Move down to SAVE and press RIGHT to save and exit. Or move down to EXIT to exit without saving.
Just like the TNC225R, the TNC335R and TNC635R has the option to switch from digital to thermal in the Zeroing Menu. If you see the pop up window asking to change modes, press up to choose OK. Pressing RIGHT will choose the highlighted option. Pressing LEFT will not exit this window.
Final Tips
When you are zeroing your reticles, write down the X and Y values and save that somewhere for future reference. If your point of impact changes and your DNT Optics scope is no longer zeroed make sure you are on the same Zero Profile and at the same time you can check the X and Y values to see if they have somehow changed. In some cases, firmware updates can wipe out the zero profiles. Knowing what the numbers were will help you to re-zero your reticle.
If you need any help or have questions about our One-Shot Zero process, reach out to our customer service department (info@dntoptics.com). Our tech support are more than happy to assist over the phone or email.
We hope this guide has been helpful for you and will get you zeroed quickly so you can go out and enjoy using your DNT Optics scope.


Leave a comment
Please note, comments need to be approved before they are published.